The generator was having a problem handling the load. In other words, it would run great when I would start it, but as soon as I would turn on the air conditioner or push the slide out, it would turn off. So I took it to a mechanic to check it out. He said I may have a bent valve. I drove home, did some research, and decided to do the work myself.
Here is a picture of the generator with its plastic green cover off. It also shows the valve cover removed to the right side of the picture.
Here is a close up of what is under the valve cover. As you can see there is some discolor of the bolt head on the right side, and the left side looks fine. What that means is that the valve seal is leaking exhaust through the top of the valve and burning the bolt head and the parts around it. That needed to be repaired.
Here are the very important 8 bolts holding the generator in the RV.
Here is the lowering of the generator. The table only went so low, so I had to use the RV jacks to jack up the RV so I could roll out the generator.
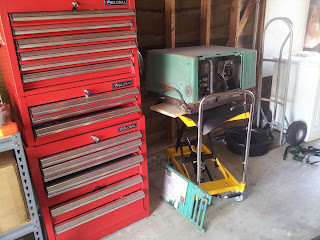
I rolled it right into the garage and took my time to rebuild it. As you can see the table lifts up so it is easy to work on the generator.
Another picture if the generator's home for about 2 months.
This is the generator with the green cover, exhaust pipe, carburetor, engine head and throttle linkage removed.
Here is a picture of the other side of the engine head. No more burnt spot! It was ready to be put back together with all new gaskets.
Here is the generator put back together. I wanted to test the generator before spending time installing it back in the RV if it needed more work. So I extended the wires and the fuel line. It ran great!
So I installed it back in the RV. Everything works great! I used the generator for the slide out on Labor day and I tested the air conditioner with it and it runs great! I now run it every week for about an hour.


No comments:
Post a Comment